
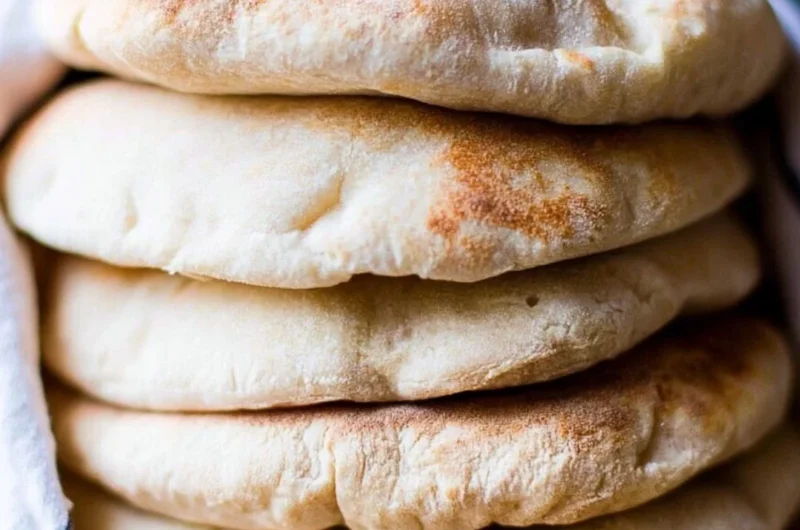
Cozy Sourdough Pita Bread: A Comforting Treat
There’s something undeniably comforting about the scent of freshly baked bread wafting through your home. It conjures up memories of warm kitchens and family gatherings, where the simplest foods often bring the greatest joy. Today, I want to share with you a simple yet soul-soothing recipe for Sourdough Pita Bread. Picture golden, tender pitas puffing up in your oven, perfect for scooping up zesty dips or wrapping around fresh ingredients for a delightful sandwich. This is the kind of bread that makes you feel at home, no matter the season.
So, gather your ingredients and get ready for a cozy baking adventure. This is one you’ll definitely want to pin for later!
Why You’ll Love This Recipe
- Warm Aroma: The smell of sourdough baking is like a hug for your senses; it fills the home with a warm, inviting aura.
- Healthier Twist: With both all-purpose and whole wheat flour, these pitas offer a nourishing bite without sacrificing flavor—perfect for your healthy meal prep.
- Versatile Use: Ideal for dipping, wrapping, or stuffing, these pitas can elevate any meal, from casual snacks to easy weeknight dinners.
- Family Fun: Get the kids involved in the rolling process; it’s an enjoyable way to bond over food and create lasting memories.
- Fast Baking: They bake in just 5-7 minutes, making them a quick addition to any meal!
Ingredients You’ll Need for Sourdough Pita Bread
- 2 cups all-purpose flour
- 1 cup whole wheat flour
- 1 teaspoon salt
- 1 teaspoon sugar
- 1 cup warm water
- 1 cup active sourdough starter
- 1 tablespoon olive oil
Let’s Make It Together
- In a large bowl, mix both types of flour, salt, and sugar until well combined.
- In a separate bowl, combine the warm water and sourdough starter, then add this mixture to the dry ingredients.
- Mix until a soft dough forms, embracing that tactile joy of kneading.
- Knead the dough on a floured surface for about 5-10 minutes until it becomes smooth and elastic.
- Place the kneaded dough in a greased bowl, cover it with a cloth, and let it rise until doubled in size, which should take about 1-2 hours.
- Preheat your oven to 475°F (245°C) and place a baking stone or tray inside to heat up. This step is key for that perfect puff!
- Once risen, divide the dough into equal parts and roll each piece into a circle about 1/4 inch thick.
- Bake the pita for about 5-7 minutes, or until they puff up and turn golden.
- Remove from the oven and cover with a towel to keep warm. This keeps them soft and inviting!
- Enjoy these fluffy delights with your favorite dips or as a sandwich!
Fun Ways to Customize It
- Herbed Pitas: Add one tablespoon of dried herbs, such as oregano or thyme, to the dough for an aromatic twist.
- Garlic Infusion: Mix crushed garlic into the olive oil and brush it onto the pitas after baking for an indulgent flavor punch.
- Spiced Options: Sprinkle a dash of cumin or chili powder into the dough for a delightful zing that adds warmth to your meal.
- Cheesy Delights: Embedding a few shredded cheese bits in the dough while kneading makes for a surprisingly indulgent pita pocket.
Chef Emma’s Helpful Tips
- Make-Ahead: You can prepare the dough in advance and store it in the fridge for up to 24 hours before letting it rise. This adds depth to the flavor.
- Storage Suggestions: Store leftover pitas in an airtight container at room temperature for up to 3 days, or freeze for longer storage.
- Perfecting the Puff: Ensure your oven is fully preheated and your baking surface is hot. This is crucial for achieving that signature pita puff!
- Looking for a Substitution?: You can swap out the all-purpose flour for gluten-free flour if you’re catering to dietary restrictions.
What’s Inside – Nutrition Breakdown
- Serving Size: 1 Pita
- Calories: 120
- Carbohydrates: 24g
- Sugar: 1g
- Fat: 1.5g
- Protein: 3g
- Sodium: 190mg
Reader FAQs About Sourdough Pita Bread
Can I make this ahead?
Absolutely! Prepare the dough the night before for a quick baking session the next day.
Can I use different ingredients?
Yes! Feel free to experiment with different types of flour like spelt or rye, but keep the ratios similar for best results.
How do I store leftovers?
Store them in an airtight container at room temperature for up to 3 days, or freeze for longer-lasting storage.
How long does it last?
If stored properly, these pitas can last for about 3-5 days at room temperature or up to 2 months in the freezer.
Cozy Closing Note
Baking Sourdough Pita Bread is not just about satisfying hunger; it’s about sharing warmth, laughter, and love through food. These delightful pitas will soon become a staple in your home, filling your kitchen with a splendid aroma that’s simply irresistible. So why not gather your ingredients today? Save this Sourdough Pita Bread recipe to your Pinterest board so it’s ready whenever you crave that warm, cozy treat! Happy baking!